

|
| My multi-zip organizer project in Robert Kaufman far east fabrics... |
I decided to make this multi-zip organizer after seeing this and a similar pattern on Craftsy. (I chose this one because it had more substance to its design, even though I liked the other one too.) With so many great red selections in my mystery box, I knew it was going to be a red-themed project. I ended up using four different fabrics, including a basic red Kona cotton for the bindings and interior pocket linings.
The exterior features Kaufman's Japanese Winter Cherry in Blossom (red). I really like this fabric; it makes the finished project look very luxurious. (My other half even commented on the fabric and he's not one to throw out such opinions casually!) The Tumbling Blocks Sashiko fabric makes up the main lining on the ends and the sides of the organizer. Finally, the interior slots between the zippered pockets features the same Kimono Floral (again in Blossom) that I used for my kimono slippers.
I still haven't decided what exactly I'm going to use this for, but it's a versatile design that can serve many purposes.
My first thought was that my travel toiletry bag was showing wear and tear from over twenty years of use and I was looking to replace it soon. Lately, though, I am being ambitious about wanting to replace it with something somewhat identical. (It's a design consisting of four triangular shaped zippered pockets that creates a rectangular "box" when rolled up. Yes, the wheels have started to turn as I attempt to create a pattern like that of my own... using waxcloth!)
|
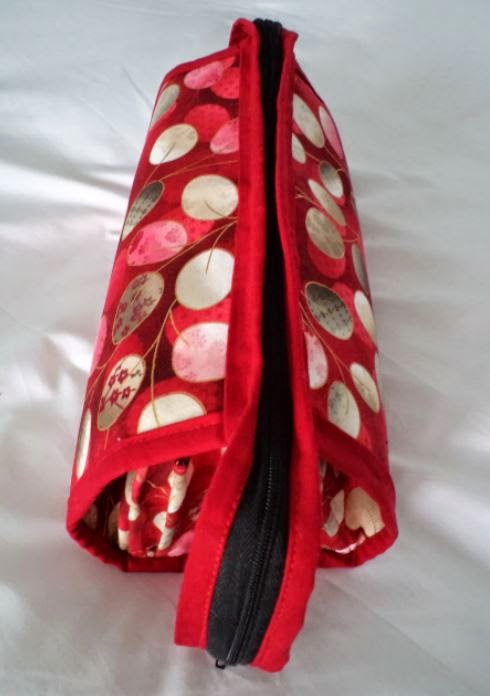
| Organizer all zipped up... |
This organizer features four zippered pockets inside, but they're "flat" pockets. The slots between most of the pockets are roomier, but less secure for smaller items. if I were to use it as a toiletry bag, I'd have to switch up how I store certain items, but it could still work.
And now for a few words — well, maybe more than a few ;-) — about how this project came together.
Have you ever purchased a pattern and then, after reading it through, suffered buyer's remorse? That was precisely the feeling I had after paging through this PDF. I simply did not see much hope of being able to complete the project based on what I saw of the instructions. Then after I actually read it, I was not only convinced of ultimate failure, I was convinced of failure even to launch. It was actually a very distressing feeling.
Other people have complained about how long (i.e., how many pages) this pattern is, but I don't see an issue in length in and of itself. If a pattern is full of helpful material that enables you to make what you're supposed to make and it takes 100 pages to convey that to you, then length is not an issue. (In my near thirty years of using computers, I have become quite good at not printing out stuff, which is at the heart of the "length issue" for most people.)
My issue with this pattern is that the instructions lack clarity and are not accompanied by photos that would otherwise compensate for lack of clarity. To be fair, I have seen a comment stating the opinion that "the instructions are well written". As a person who makes a living writing instructions, I can only say that the instructions are: 1) by opinion, not entirely clear in a lot of places, and 2) by fact, not as complete as it could be in many ways. In such situations, if the text is supplemented by a good photo or two, there might be no problem. But that is not the case here.
Entire sections (e.g., attaching the lining, installing the wrap-around exterior zipper) are without photos. The section that describes how to attach the side bindings shows a photo of the item with the side bindings already attached... hardly helpful.

|
| With help from "elsewhere", I was able to be successful with this pattern... |
But — you would then imagine that if the pattern indicated that additional help in the form of sew-alongs, videos and other photos were available on a dedicated website, you would feel some relief, right? Well, that relief would be temporary, because you would not be able to find any of the additional help... nothing, nada, zip. At the time that I purchased this pattern, the part of the dedicated website that had to do with the pattern/project itself had not been updated in several months. Even now — several months later again — the site remains static.
So how did I ultimately wind up with a successful result? I turned to other sources online, most notably a detailed sew-along for that "other" pattern that's out there. Turns out the project is not at all as complex as I originally feared. But this particular design is somewhat tricky, with a lot of layers to manhandle and curve around at the side seams and you end up revisiting that area over and over and over... and over. (Oh, and sewing up the first and second set of side pleats was torture given how close those first couple of zippered pockets are!)
Ironically enough though, once you've made one of these — or if you've done a similar project — you can throw away the instructions. (I'm not kidding. Come back in two weeks and see what I made a couple of days after I finished this project. Come back in a month and I'll have my own pattern for sale.)
The exterior of my organizer was interfaced with Decor Bond and some fusible fleece. All of the interior pieces (with the exception of the pocket linings) were also interfaced with Decor Bond. I purchased a 10 pack of red zippers on eBay for $1.99. (They were advertised as 9" zippers, but for some reason, these were just a tad over 8". As it turned out, I made zipper extensions at both ends and believe that the project was ultimately easier to complete that way, since it eliminated a lot of the bulk from the top of the side pleats.) The exterior wrap-around closure called for a 24" zipper, but the cheapest 24" zipper that I could find was well over $6. I lucked upon an extremely long duvet zipper for just pennies over $3 (the part that I cut off was put to use days later for another project, by attaching a zipper pull to it).

|
| This was my first time installing bindings... |
Final assessment? The finished product is quite nice, as you can see. Let me say that it's an inspired, functional design, with particular attention to detail for its intended purpose, lest anyone draws the wrong conclusion from my comments about the pattern. I very much like the organizer and will find a use for it. I'm glad I didn't give up on it. Or rather, I'm glad I didn't give up looking for appropriate resources to help me make it. (Will I make another? Probably not; certain aspects of the design were very frustrating to complete and I'm not one to take on frustration.)
But I stand by my opinion that the pattern should have been better put together. There is no excuse for all of that additional "help" not being available as promised. A $12 PDF (it's actually even more expensive now) shouldn't require you to scour the world [wide web] for assistance.